

For all the changes in notifications starting in iOS 10 the coolest is the service extension and the content extension. The service extension intercepts push payloads from apps, and gives you the chance to change content in the notification before it is presented. The Content extension gives you the same tools you have in an app to design your notification in interface builder.
Extensions are background applications, running independently from your app. They are around even when the app is not in the foreground. These two extensions offer some powerful new tools for notification development.
I’ll be continuing lessons from the last two posts. Since the first one requires registration with apple, there is no download. Before you do this, check out my first post on making push notifications here and the second on push notification actions here. There’s lot of steps I’ll assume you already know in this lesson from those lessons.
User Info
So far, you’ve added everything to the aps dictionary in the payload. APNs does not restrict you to these few content objects.
Go to the payload editor. So far we have this:
{
    "aps":{
        "alert":{
            "title":"Push Pizza Co.",
            "body":"Your pizza is  almost ready!"
        },
        "badge":42,
        "sound":"default",
        "category":"pizza.category",
    }
}
I placed everything in the aps dictionary. The aps dictionary of the payload are system defined key value pairs. If you place things outside this dictionary, but in the JSON dictionary, they are user defined values. For example, place a comma after the aps dictionary ends and then add these two lines:
  "order":["Huli pizza","Lilikoi punch","Duke Pie"],
         "subtitle":"Your order is ready!"
On the first line I added a list for my order in an array. There’s no subtitles in the aps dictionary, yet subtitle is a property in the notification content, so I put it as userInfo for now.
These store in the userInfo dictionary of the notification content. You have to move them from userInfo to the right place in the notification.
The Service extension
Storing that data in the userInfo property of UNNotificationContent object might be great, but how to we use them in a push notification? In the UserNotifications framework, Apple introduced the Notification Service Extension. It’s a small program running in the background of your device that intercepts your payload before notification center presents your push notification. In the service extension, you can modify your content with a UNMutablenotificationContent object modifying your content. That can be decrypting a encoded message or grabbing data in the userInfo to modify the content.
To set up the Notification Service extension, you’ll need a new target in your application. In Xcode, go to File>New Target.

Select iOS, and you’ll find in the list the notification service extension.
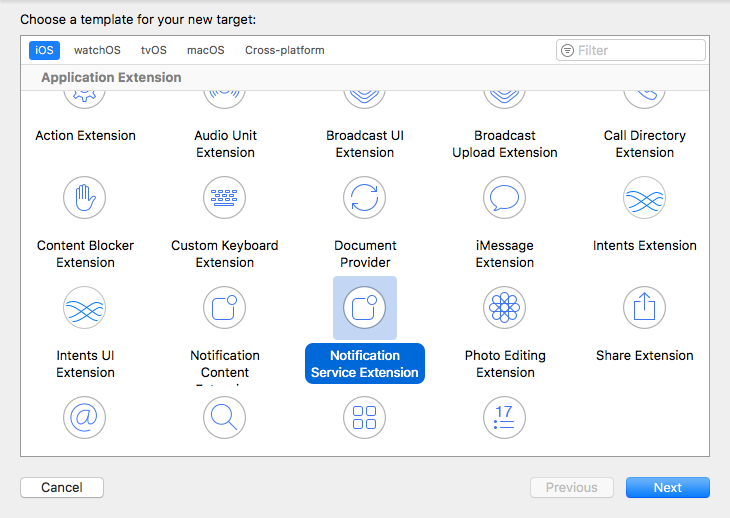
Select it, click Next and it will ask for a product name. I usually name this by suffixing ServiceExtension to my app name, so make it PushPizzaDemoServiceExtention. Click Finish.
![]()
You’ll get a question about activating the extension. Go ahead and activate it.

You’ll find in the navigator a new group. This is the service extension. Open it up and you’ll find two new files.

Open it up and you’ll find two new files. Click on the NotificationService.swift file. This is only two functions and two properties. The core method is the didRecieve(Request: withContentHandler:) . Apple even started coding for you. The method assigns the content handler closure to one of the two properties. The other property, bestAttemptContent is a mutable copy of your push notification’s content. In this method, you change the content for the push notification, loading all that rich content you couldn’t fit in the payload, or do any change to the content you wish. For example, Apple’s template changes the title.
if let bestAttemptContent = bestAttemptContent {
   // Modify the notification content here...
   bestAttemptContent.title = "\(bestAttemptContent.title) [modified]"

   contentHandler(bestAttemptContent)
}
Always leave the function call to contentHandler there. That changes the content.
Go over to the payload. To use a notification extension, you must have the following key value pair in your payload’s aps dictionary:
"mutable-content":1
Go over to your payload and add that to the payload, which should now look like this:
{
    "aps":{
        "alert":{
            "title":"Push Pizza Co.",
            "body":"Your pizza is  almost ready!"
        },
        "badge":42,
        "sound":"default",
        "category":"pizza.category",
        "mutable-content":1
    },
    "order":["Huli pizza", "Lilikoi punch","Duke pie"],
    "subtitle":"Your Order is ready",
    }
Coding the Service Extension with UserInfo
In the service extension, delete this line:
bestAttemptContent.title = "\(bestAttemptContent.title) [modified]"
We’ll replace it with our code. I’m going to place the custom information into the body, giving a list of the order, and add the subtitle to the subtitle property. You’ll need the userInfo dictionary. I’ll make referring to the dictionary easier by making it a constant in the function, casting it to the JSON dictionary type of [String:Any]
//get the dictionary
let userInfo = bestAttemptContent.userInfo as! [String:Any]
Subtitles are user info in a payload but are a property of UNMutableNotificationContent, so it needs transferring to the property. Since it’s a dictionary entry, I’ll have to unwrap it and check for nil. If not nil, I have a subtitle and I can update the value. I downcast the value to String when assigning it the subtitle content, since the dictionary has the value as Any.
//change the subtitle
        if userInfo["subtitle"] != nil{
            bestAttemptContent.subtitle = userInfo["subtitle"] as! String
        }
The payload has an array of items ordered. I’ll make that the notification body text like this:
//change the content to the order
if let orderEntry = userInfo["order"] {
    let orders = orderEntry as! [String]
    var body = ""
    for item in orders{
        body += item + "\n "

    }
    bestAttemptContent.body = body
}
I’ll first check if the entry exists in the userInfo dictionary. If it does, create a string array orders from it. In the loop I’ll concatenate the orders into a string body, separating them with tabs. After the loop, I’ll change the bestAttemptContent.body to the new content.
The Content Extension
You’ve loaded content through the service extension. There’s another extension that gives you a storyboard to format your output, and add other types of objects. The Content extension gives you a view controller and storyboard to create your own notification look. TO add a content extension, go to File> New > Target. Under iOS you’ll find the service extension.

Select it and click Next. Save a name of PushPizzaContentExtension. Click Finish, then activate.
You’ll find a new target on the navigator. Open it up and it is three files: A navigating controller, a storyboard and a info.plist.

Open up the storyboard an you’ll find a very short looking scene. It’s here you will design your application.

There’s one limitation to this storyboard. Interactive controls like buttons don’t work. You are always limited to static controls. With that in mind it’s time to design a custom notification
Change the UI
You’ll see the storyboard is a bit small, meant to cover only a small notification of the single label. Click the view controller icon and then go to the size inspector. The simulated size under freeform is 320 by 37.

Change the Height to 150 to give us some space to work. This notification will look different on different devices, so use auto layout to place three labels. If you are not familiar with using auto layout, don’t fret. I’ll take you through the steps.
Delete the current label. Drag three new labels to the storyboard. Put two towards the top right and one towards the bottom left.

Change the text of the top label to <Title>. I use angle brackets to document this is where I’m adding the content from the content.The middle one to <Subtitle> and the bottom to <Body>
On the <Title> label make the font Title1, right justified. It won’t fit, so drag to the left handles over so it goes completely across the scene, then right justify it. On the <Subtitle> label, set the text to Title 2, also right justifying. On the <Body> label, set the lines to 0 and the line break to word wrap. This will word wrap the order in the body if necessary.

You’ll add some auto layout to this next. Click the <Title> label. Using the pin ![]() tool, Pin up 10,left 4 and right 4 with the margins on, updating items of new constraints. Remember to press tab after every field. The pin tool should look like this. Add the 3 constraints.
tool, Pin up 10,left 4 and right 4 with the margins on, updating items of new constraints. Remember to press tab after every field. The pin tool should look like this. Add the 3 constraints.

The subtitle is a bit tricky. Pins in this storyboard always go to the superview. Using the pin tool ![]() like you did for the title, pin the left and right sides of subtitle 4 left and 4 right with constrain to margins on.
like you did for the title, pin the left and right sides of subtitle 4 left and 4 right with constrain to margins on.

Don’t update the view yet, just add the two constraints. Next control-drag from the subtitle to the title. Select vertical spacing in the menu that appears.

In the size inspector find the constraint:
![]()
Click Edit and change the constant to 10.

Now click the update frames button ![]() to update the frames.
to update the frames.
Finally, select the body. Using the pin tool, pin it left 4, right,4 and bottom 10, with constrain to margins on and updating the frames. The completed layout should look like this:

You have a layout for your notification. Just like an app, I’ll set my outlets. Since I deleted a control, Use Shift-Command-K to clean the project before going on. Close the attributes inspector. Open the assistant editor.
Control Drag from <Title>and make an outlet titleLabel.
Control-drag from <Subtitle>and make an outlet subtitleLabel.
Control-drag from <Body> and make an outlet bodylabel.
Close the assistant editor. I’ve now connected the the four outlets for the objects on the storyboard. The next step is to write some code.
Code the controller
Go to the NotificationViewController.swift file. Unlike most view controllers, there’s a special method here: didReceive: notification:. Besides a viewdidLoad, there’s no other methods you’re used to in a view controller. You’ll see in the method we have a template on how to use it.
In this method’s parameter, we have the full notification. It could be either a push or a local notification. We extract the contents in this method and then populate the fields. Delete this code in the method.
self.label?.text = notification.request.content.body
To make things easier make a constant for the content of the notification:
let content = notification.request.content
I’ll use instead of notification.request.content every time. I can now populate the labels with their content.
titlelabel.text = content.title
subtitleLabel.text = content.subtitle
bodyLabel.text = content.body
With these three, we get all of our text labels into the notification.
The Property List
We’ve got one more step to go. Go back to Xcode. There one more file in the extension we’ve yet to look at. Click on the info.plist. Towards the bottom open the NSExtension. Inside that there’s several properties. Open the NSExtensionAttributes. You’ll find in there the UNNotificationExtensionCategory property.
Content extensions runs off categories, so whatever category this property is the category of the notification found in content.category. Change it to pizza.category. This extension will run for only the pizza.category notifications. If an extension has another category, it will not run. Remember to do this. If you forget this, the extension it will not work for you.
Run the Notification
You are ready to run the notification. When you add extensions, Xcode often defaults to the run scheme for the extension. Check to make sure you are on your device run scheme for the app
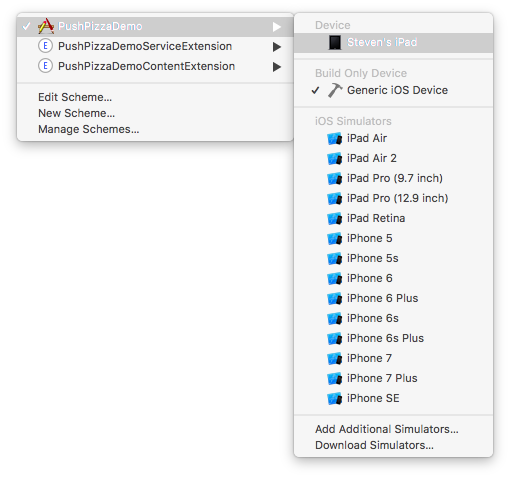 .
.
Run the application. Copy and paste the payload to the test platform. If you haven’t done so for this device, copy and paste the token for the app.

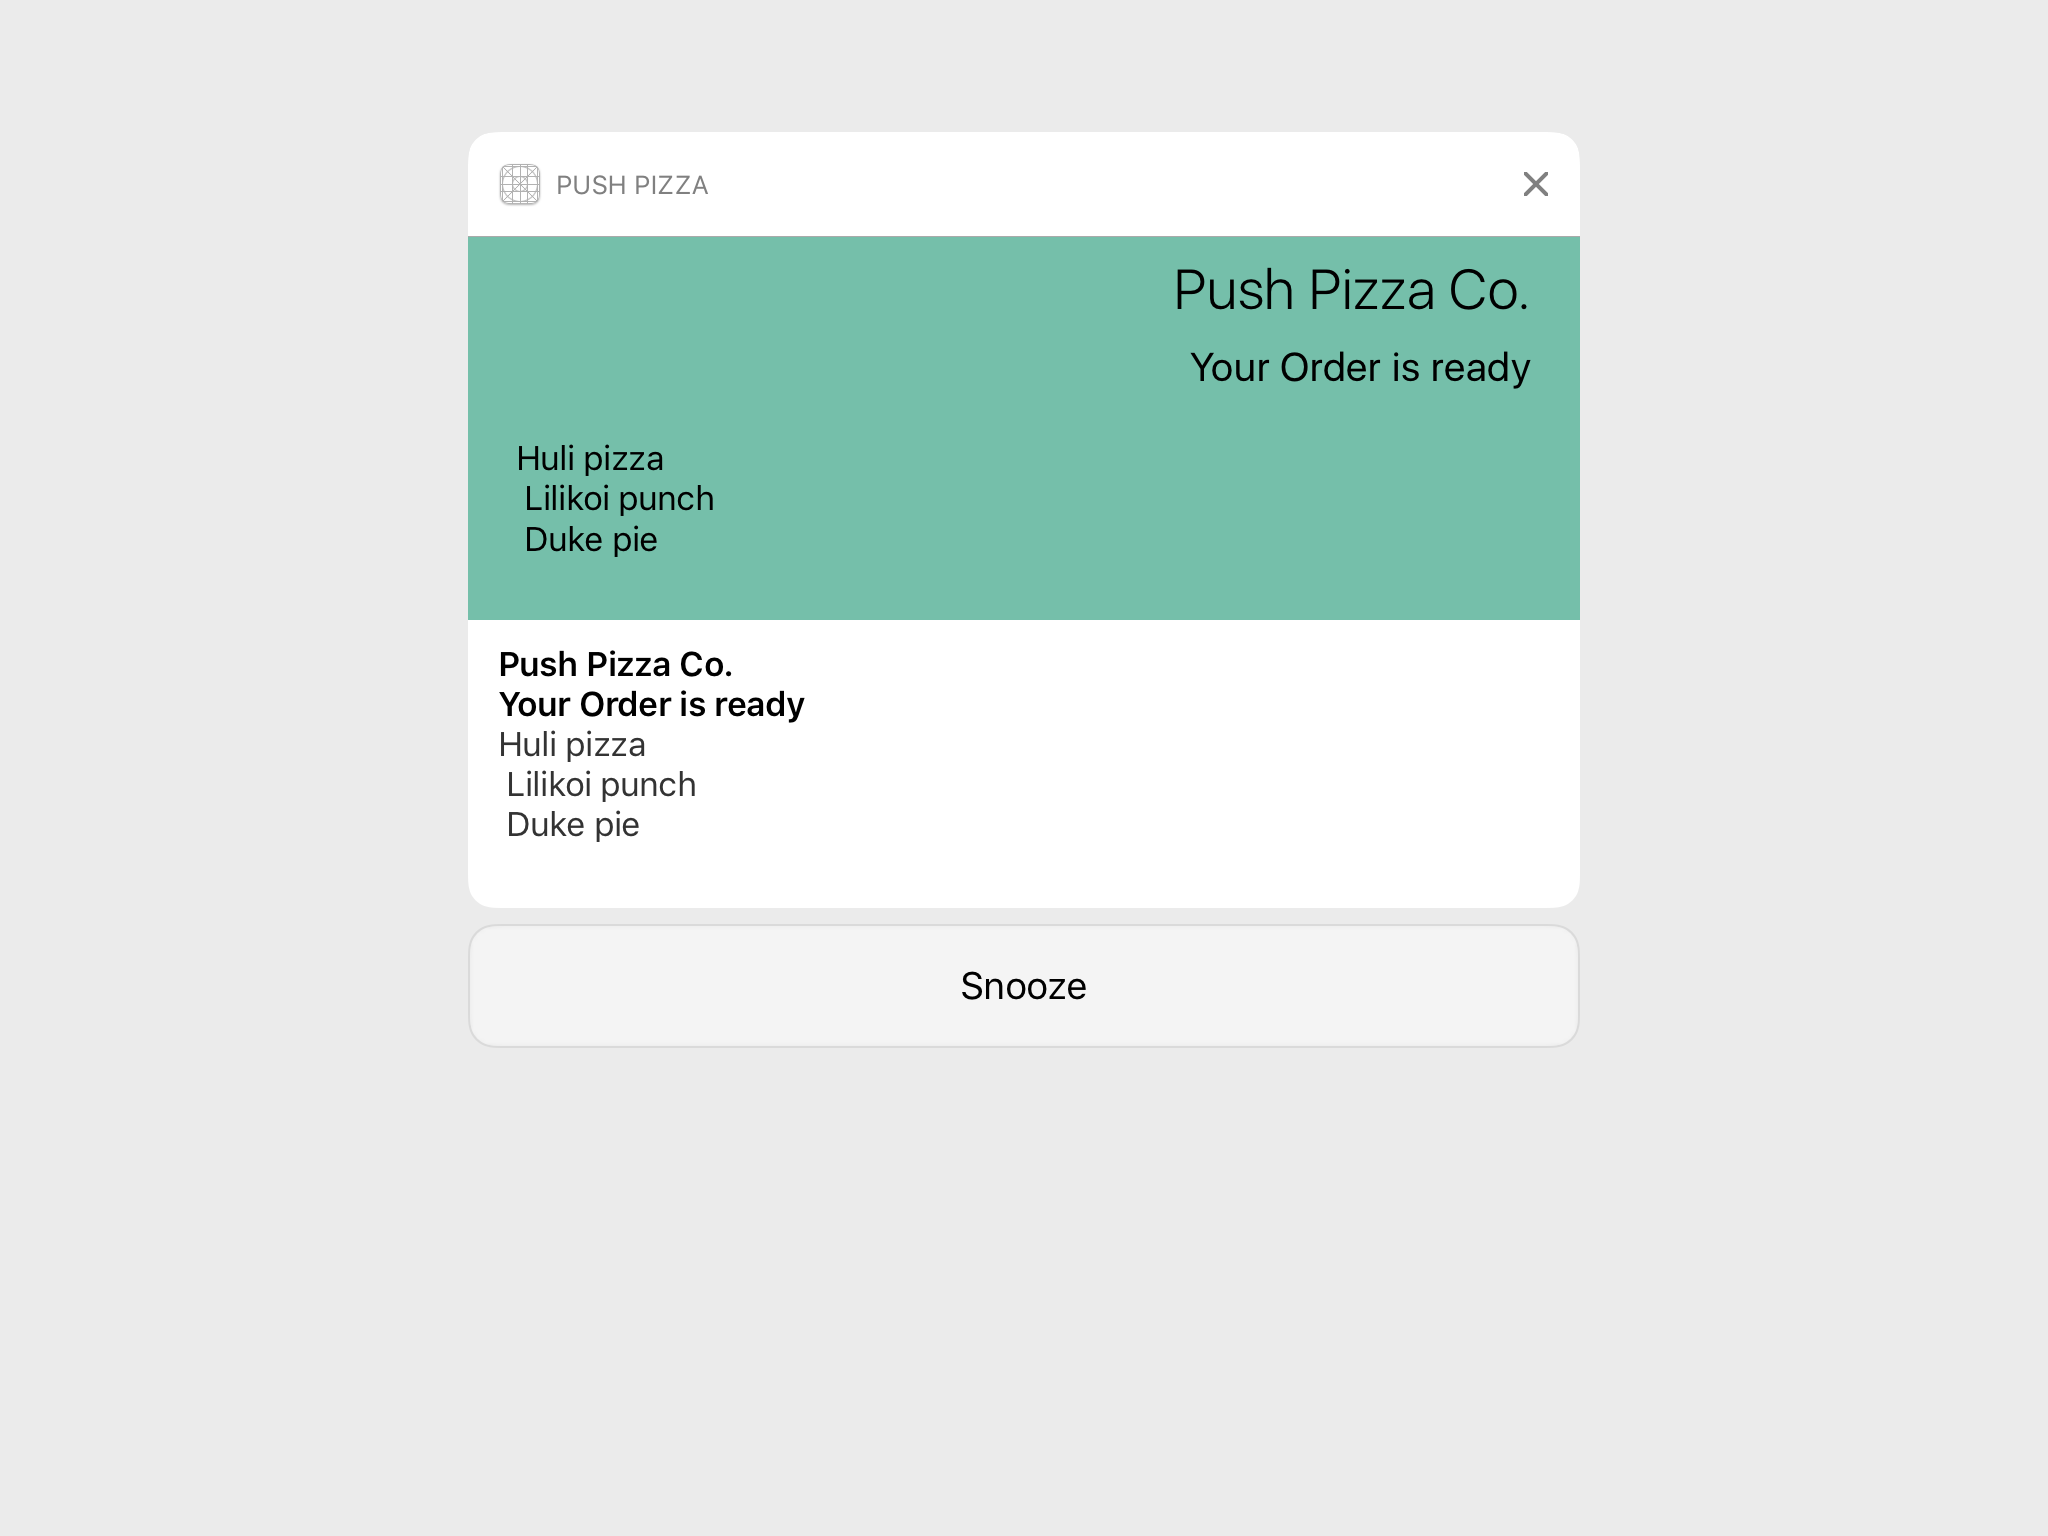
Send the notification. When it appears like this

Swipe down

You get a custom notification, with alignment and font changes, but it is too big.
Resizing the Notification.
Go back to Xcode. The easiest way to restrict the notification is to add these two lines of code to viewDidLoad in the NotificationViewController.swift file in the content extension:
let size = view.bounds.size
preferredContentSize = CGSize(width: size.width, height: size.height / 4.0)
This code changes the height of the notification to a quarter the size of the notification. Depending on your notification, you can change this size by changing the 4.0. Run with this code, then send a notification from the test platform. When the notification appears on the device, swipe down. You get a better sized notification.
Removing the Bottom Notification
You see in white on the bottom of the notification the original notification. You may not want that on your notification. Let me show you how to hide that. In Xcode, Go back to the info.plist for the content extension again. Click the + for the NSExtentionAttributes.
![]()
In the new attribute, give it a key UNNotificationExtensionDefaultContentHidden. Change it to a Boolean value, and set it to YES.

Run again so it loads everything. Send the notification in the platform.The bottom disappears.

If all you add to the storyboard is new user content like map, You may leave the white content to have the original message.
This is some of the basics of the service and content extensions. With a bit of work you can add images, maps and other objects to the extensions to make for a very rich notification for your users. Remember while the service extension is for push notifications only, you can use the content extension for local notifications and push notifications.
The Whole Code
payload.apns
{
    "aps":{
        "alert":{
            "title":"Push Pizza Co.",
            "body":"Your pizza is  almost ready!"
        },
        "badge":42,
        "sound":"default",
        "category":"pizza.category",
        "mutable-content":1
    },
    "order":["Huli pizza", "Lilikoi punch","Duke pie"],
    "subtitle":"Your Order is ready"
}
AppDelegate.Swift
//
//  AppDelegate.swift
//  PushPizzaDemo
//
//  Created by Steven Lipton on 1/2/17.
//  Copyright © 2017 Steven Lipton. All rights reserved.
//

import UIKit
import UserNotifications

@UIApplicationMain
class AppDelegate: UIResponder, UIApplicationDelegate, UNUserNotificationCenterDelegate {

    var window: UIWindow?

    func setCategories(){
        let snoozeAction = UNNotificationAction(identifier: "snooze.action", title: "Snooze", options: [])
        let pizzaCategory = UNNotificationCategory(identifier: "pizza.category", actions: [snoozeAction], intentIdentifiers: [], options: [])
        UNUserNotificationCenter.current().setNotificationCategories([pizzaCategory])
    }


    func application(_ application: UIApplication, didFinishLaunchingWithOptions launchOptions: [UIApplicationLaunchOptionsKey: Any]?) -> Bool {
        // Override point for customization after application launch.
        setCategories()
        UNUserNotificationCenter.current().delegate = self
        UNUserNotificationCenter.current().requestAuthorization(options: [.alert,.sound,.badge])
        {(granted,error) in
            if granted{
                application.registerForRemoteNotifications()
            } else {
                print("User Notification permission denied: \(error?.localizedDescription)")
            }

        }
        return true
    }

    func tokenString(_ deviceToken:Data) -> String{
        //code to make a token string
        let bytes = [UInt8](deviceToken)
        var token = ""
        for byte in bytes{
            token += String(format: "%02x",byte)
        }
        return token
    }

    func application(_ application: UIApplication, didRegisterForRemoteNotificationsWithDeviceToken deviceToken: Data) {
        //TODO: Add code to get token here
        print("Successful registration. Token is:")
        print(tokenString(deviceToken))
    }

    func application(_ application: UIApplication, didFailToRegisterForRemoteNotificationsWithError error: Error) {
        print("Failed to register for remote notifications: \(error.localizedDescription)")
    }


//MARK: - Delegates

    func userNotificationCenter(_ center: UNUserNotificationCenter, willPresent notification: UNNotification, withCompletionHandler completionHandler: @escaping (UNNotificationPresentationOptions) -> Void) {
        let request = notification.request
        print ("request identifier: \(request.identifier)" )
        completionHandler([.alert,.badge,.sound])
    }


    func userNotificationCenter(_ center: UNUserNotificationCenter, didReceive response: UNNotificationResponse, withCompletionHandler completionHandler: @escaping () -> Void) {
        let action = response.actionIdentifier
        let request = response.notification.request

        if action == "snooze.action"{
            let content = changePizzaNotification(content: request.content)

            let snoozeTrigger = UNTimeIntervalNotificationTrigger(timeInterval: 5.0, repeats: false)
            let snoozeRequest = UNNotificationRequest(identifier: "pizza.snooze", content: changePizzaNotification(content:content), trigger: snoozeTrigger)
            center.add(snoozeRequest){
                (error) in
                if error != nil {
                    print("Snooze Request Error: \(error?.localizedDescription)")
                }
            }
        }
        completionHandler()
    }

    func changePizzaNotification(content oldContent:UNNotificationContent) -> UNMutableNotificationContent{
        //get a mutable copy of the content
        let content = oldContent.mutableCopy() as! UNMutableNotificationContent
        //get the dictionary
        let userInfo = content.userInfo as! [String:Any]
        //change the subtitle
        if userInfo["subtitle"] != nil{
            content.subtitle = userInfo["subtitle"] as! String
        }
        //change the body with the order
        if let orderEntry = userInfo["order"] {
            var body = ""
            let orders = orderEntry as! [String]
            for item in orders{
                body += item + "🍕🏄🏽\n"
            }
            content.body = body
        }
        return(content)
    }
}
PushPizzaDemoServiceExtension: NotificationService.swift
//
//  NotificationService.swift
//  PushPizzaDemoServiceExtension
//
//  Created by Steven Lipton on 1/5/17.
//  Copyright © 2017 Steven Lipton. All rights reserved.
//

import UserNotifications

class NotificationService: UNNotificationServiceExtension {

    var contentHandler: ((UNNotificationContent) -> Void)?
    var bestAttemptContent: UNMutableNotificationContent?


    override func didReceive(_ request: UNNotificationRequest, withContentHandler contentHandler: @escaping (UNNotificationContent) -> Void) {
        self.contentHandler = contentHandler
        bestAttemptContent = (request.content.mutableCopy() as? UNMutableNotificationContent)

        if let bestAttemptContent = bestAttemptContent {
            let userInfo = bestAttemptContent.userInfo as! [String:Any]
            //change the subtitle
            if userInfo["subtitle"] != nil{
                bestAttemptContent.subtitle = userInfo["subtitle"] as! String
            }
            //change the content to the order
            if let orderEntry = userInfo["order"] {
                let orders = orderEntry as! [String]
                var body = ""
                for item in orders{
                    body += item + "\n "

                }
                bestAttemptContent.body = body
            }


            contentHandler(bestAttemptContent)
        }
    }

    override func serviceExtensionTimeWillExpire() {
        // Called just before the extension will be terminated by the system.
        // Use this as an opportunity to deliver your "best attempt" at modified content, otherwise the original push payload will be used.
        if let contentHandler = contentHandler, let bestAttemptContent =  bestAttemptContent {
            contentHandler(bestAttemptContent)
        }
    }

    func changePizzaNotification(content oldContent:UNNotificationContent) -> UNMutableNotificationContent{
        let content = oldContent.mutableCopy() as! UNMutableNotificationContent
        //get the dictionary
        let userInfo = content.userInfo as! [String:Any]
        //change the subtitle
        if let subtitle = userInfo["subtitle"]{
            content.subtitle = subtitle as! String
        }

        //change the body with the order
        if let orderEntry = userInfo["order"] {
            var body = ""
            let orders = orderEntry as! [String]
            for item in orders{
                body += item + ", "
            }
            content.body = body
        }
        return content
    }
}
PushPizzaDemoServiceExtension: NotificationViewController.swift
//
//  NotificationViewController.swift
//  PushPizzaDemoContentExtension
//
//  Created by Steven Lipton on 1/5/17.
//  Copyright © 2017 Steven Lipton. All rights reserved.
//

import UIKit
import UserNotifications
import UserNotificationsUI

class NotificationViewController: UIViewController, UNNotificationContentExtension {

    @IBOutlet weak var titlelabel: UILabel!
    @IBOutlet var subtitleLabel: UILabel!
    @IBOutlet var bodyLabel: UILabel!
    override func viewDidLoad() {
        super.viewDidLoad()

//set the proportional vertical size of the notification.
        let size = view.bounds.size
        preferredContentSize = CGSize(width: size.width, height: size.height / 4.0)
    }

    func didReceive(_ notification: UNNotification) {
        let content = notification.request.content
        titlelabel.text = content.title
        subtitleLabel.text = content.subtitle
        bodyLabel.text = content.body
    }
}

Leave a comment