
In an early post on this site, I wrote a table view tutorial. I decided to update that tutorial a bit for The Swift Swift View Controllers Book and add a bit more sophistication and depth. This tutorial deep dives in the subject. Both will remain on the site. In October 2016 I updated this for Swift 3.0 [Revised 5/6/15 Swift 1.2 changes ][ Revised 10/1/16 Swift 3.0]
Basics of Table Views
The workhorse control in iOS is the table view. With both a delegate and data source it is powerful and flexible but far from simple. Table views have many uses. They can provide navigation much like a Tab bar. Tab bars use them in the more tab. They work very well for selection and listing of long amounts of data, as they are scrollable. As the basic unit of a table view, a cell is a view itself. As a subclass of UIView, cells customize easily.
Rows and Sections
All table views have rows and sections. For example, here is a table view with three sections: Pizza, Deep Dish Pizza and Calzone

Sections here have their own headers. Under the headers are rows. For Deep Dish Pizza, we have several types of pizza, such as Sausage, Meat Lover’s, Veggie Lover’s and so on. The developer has control over the way rows and sections set up.
Static and Dynamic Tables

There are two types of Table views: Static and dynamic. Static table views have a specific number of table sections and a specific number of rows in each section set at design time. They are easy to set in the storyboard. As table row cells are views, you can place any control you want in a cell and format using Auto layout. You can find a good example of a static table in any settings page like the one on the right. Static tables also make a way to perform navigation using Navigation controllers much like tab views.
 Dynamic tables generate the table from data, and can change during run time. The pizza menu to the left is a dynamic table, generated by an array for the sections and an array of arrays for the rows. It can even generate its own background for each cell. Once you understand basic table views, you can edit the table view dynamically at run time, adding, removing and recording the data in the table. There are many apps that are complicated Dynamic table views. Social media apps like Facebook, Twitter and Instagram are dynamic table views with sophisticated layouts.
Set Up the Application
We will build part of a menu application to demonstrate both static and dynamic tables. You can download the entire completed project here: swifttableviewdemo.zip Make a new project with Command-Shift-N or File>New>Project… Name the project SwiftTableViewDemo. Set the device to Universal and the language to Swift.
Table View and Navigation Controller
Go to the storyboard. Delete the current view controller on the storyboard. Drag a Table View Controller to the storyboard.
Select the new table view controller on the storyboard. In the attributes inspector, click on Is Initial View Controller. From the drop-down menu select Edit>Embed in>Navigation Controller. The story board should look like this.

In the navigation bar, drag a bar button item into the upper right corner. Title it Order. This button will launch the table view. Our root view will show our pizza and dessert order after we get it. We will code this view last.
Press Command-N for a new file. Select a Cocoa Touch Class which subclasses UITableViewController named RootTableViewController. Use Swift as the language. Save the file. There will be a lot of commented out code here. In its current state the code will run, but do nothing.
Go back to the storyboard. Select the table view and in the identity inspector, change the class to RootTableViewController.
We need to make two changes to the table view in the attributes inspector. You may find table views are difficult to select views on the storyboard. Use the document outline. If not already open, click the button in the lower right of the storyboard to open the document outline. In the outline find the Root Table Controller.

Open up the arrow next to the root controller then the table view.

Click the Table View Cell. In the properties inspector, set the Style to Basic, and the Identifier to cell.

Adding the Static Table View
Drag a table view controller to the right of the view controller. Control drag from the order button to the Table View Controller to make a segue. Select a show segue. Click the segue and give it an identifier of Order in the properties inspector.
Get a new file by pressing Command-N. select Cocoa Touch Class subclassing UIViewController. Name the file FullMenuViewController. Use Swift as the language. Save the file. We did not use the UITableViewController for a subclass to get a less cluttered class. To work as a table view controller, Change the superclass to UITableViewController.
class FullMenuViewController: UITableViewController{
Go back to the storyboard. Click the view controller icon. In the identity inspector, change the class to FullMenuViewController.
In the document outline, click the Table View for the FullMenuViewController. In the property inspector, change the content to Static Cells.

The table will now change from Prototype content to static cells, and have a different arrangement.

Change the sections to 2, and you will get two sections with headers.

In the document outline, Select Section-1.

In the properties inspector, change the Header to Pizza. Select Section-2. In the properties inspector change the Header to Dessert. Change the Rows for the table view section to 2.

We have configured the table to have two sections. The first section will have three cells. The second section, the dessert section, will have two cells.
Open up Pizza in the document outline, and there will be three table view cells. Select the top Table View Cell in the document outline.

Change the style to Basic in the properties inspector. The storyboard will now have the word Title on it. Open up the Pizza until the title is visible. Select Title.

In the attributes, Change Title to Pizza. In non-custom layouts, there are one or two system labels applied to the table view cell. We can change those labels like any other label.
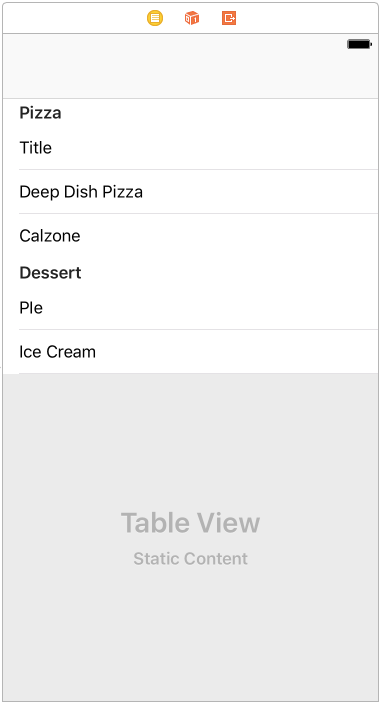
Now do the same for the two other table view cells in the Pizza section. Add the titles Deep Dish Pizza and Calzone to the labels. Do the same for the Dessert cells, adding Pie and Ice Cream. Your table view should look like this:
Add a bar button for saving our order. After your first table controller, navigation bars do not get included in the controller on the story board. You need to add them yourself. If you don’t, you will not be able to drag a bar button to the upper right corner. Dragging a Navigation Item to the gray area for the navigation bar. In the attributes inspector, set the title to Full Menu. Now you can drag a bar button item to the upper corner. Set the Title to Save.
Adding the Dynamic Table View
Drag another table view onto the storyboard. A dynamic table view appears by default. Drag the new table view controller to the right of the full menu view controller.

We’ll make one view controller, and hook up the three pizzas to it. In the document outline, control-drag from the Pizza cell to the new table view. Make a show segue. Make a segue identifier named Pizza. Control-drag from the Deep Dish Pizza cell to the new table view. Make a show segue. Make a segue identifier named Deep Dish. Control-drag from the Calzone cell to the new table view. Make a show segue. Make a segue identifier named Calzone.
Drag a Navigation Item on the scene’s navigation bar. Change the title to Pizza Menu.
There is only one cell for the prototype cell. Select the cell in the document outline.

Change the style to Subtitle. Under the style, you will find an identifier. Change the identifier to cell.
This is the reuse identifier. When we code cell contents, we will use this to identify the cell. You may have more than one kind of cell. This is a way of keeping them organized.
Build and run and you will be able to navigate from the order button to the order view, and from the pizzas to the blank table view controller.
Building the Models
Before we start coding the table view controllers, we need to make not just one but two models. We will need the model that will carry our order, and a class that will define the list that goes into the table view.
The Order Model
Press Command-N and make a new Cocoa Touch Class named OrderModel with Swift. Subclass it to NSObject. Change the class that appears to this:
class MenuItem: NSObject {
    var name = "None"
    var price = 0.00
    var special = false
    override init(){}
    init(name:String,price:Double,special:Bool){
        self.name = name
        self.price = price
        self.special = special
    }
}
}
The model is a String for the name of the menu item, a Double for the price and a Bool if it is a special. You can initialize all three values with an init method for the class.
The Table View’s Model
Single arrays often describe the table view for single section tables. In multiple section tables, there is more than one array. In our case, we will make a three section table for the three different kinds of pizza. Press Command-N and make a new Cocoa Touch Class named MenuItems with Swift as a the language. Subclass it to NSObject. Change the class that appears to this:
class MenuItems:NSObject{
    var sections:[String] = []
    var items:[[MenuItem]] = []

    func addSection(section: String, item:[MenuItem]){
        sections = sections + [section]
        items = items + [item]
    }
}
The MenuItems class is very abstract. Our table view will require a array for the names of the sections and another array of the same size as the sections array. In that array we will stick arrays as elements which are the sections. This array of arrays will reference every section and every row in that section. The property sections is the string array containing the names of the sections. The property items is an array of arrays, hence the double brackets for [[MenuItems]].
We add a section of the menu table by the method addSection, which adds the section and the item array to the existing property.
We could use this class one of two ways. We could make an instance of MenuItems within the view controller and then use the addSection method on the instance. That is a lot of code and data in a view controller. I can only use it in that view controller. A more flexible approach is subclassing MenuItems. Under the MenuItems class, add this.
class PizzaMenuItems: MenuItems {
    override init() {
        super.init()

        add(section:"Pizza", item: [
            MenuItem(name:"Margherita",price:7.95,special:false),
            MenuItem(name:"BBQ Chicken",price:11.49,special:false),
            MenuItem(name:"Pepperoni",price:8.45,special:false),
            MenuItem(name:"Sausage",price:8.45,special:false),
            MenuItem(name:"Seafood",price:12.75,special:false),
            MenuItem(name:"Special",price:13.50,special:true)
        ])
        add(section:"Deep Dish Pizza", item: [
           MenuItem(name:"Sausage",price:10.65,special:false),
           MenuItem(name:"Meat Lover's",price:12.35,special:false),
           MenuItem(name:"Veggie Lover's",price:10.00,special:false),
           MenuItem(name:"BBQ Chicken",price:16.60,special:true),
           MenuItem(name:"Mushroom",price:11.25,special:false),
           MenuItem(name:"Special",price:15.45,special:true)
        ])
        add(section:"Calzone", item: [
          MenuItem(name:"Sausage",price:8.00,special:false),
          MenuItem(name:"Chicken Pesto",price:8.00,special:false),
          MenuItem(name:"Prawns and Mushrooms",price:8.00,special:false),
          MenuItem(name:"Primavera",price:8.00,special:false),
          MenuItem(name:"Meatball",price:8.00,special:false)
        ])
    }

}
I subclass MenuItems with PizzaMenuItems. When I instantiate this class, I add the data to the properties of MenuItems. I can make an instance of PizzaMenuItems whenever I need this list.
Code the Dynamic Table View
We next code the table view controller. We did subclass TableViewController for the RootTableViewController, but like many Apple templates, it has a lot of confusing extra code sitting in comments. To simplify things and to illustrate more effectively what you do need get a table view controller working, we will subclass UIViewController and then make a few changes.
Make the File
Type Command-N to make a new file. Make a Cocoa Touch Class called PizzaMenuTableViewController subclassing UIViewController and using Swift. Delete everything in the class except viewDidLoad. Change the superclass from UIViewController to UITableViewController. Your class should look like this:
class PizzaMenuTableViewController: UITableViewController {

    override func viewDidLoad() {
        super.viewDidLoad()
    }

}
Add the two models as properties under the class definition:
var myOrder = MenuItem()
let menuItems = PizzaMenuItems()
Set the Data Source
All table views require two data source methods. They return to the Table View how many sections and how many rows in each section. Add the following to your code:
override func numberOfSectionsInTableView(tableView: UITableView) -> Int {
       // Return the number of sections.
        return menuItems.sections.count
    }
This returns the count of the number of sections.
The second required method is a count of rows in each section. The numberOfRowsInSection method has a parameter of section. We count the array of items for the current section. Add this to the code:
    override func tableView(tableView: UITableView, numberOfRowsInSection section: Int) -> Int {

        // Return the number of rows in the section.
        return menuItems.items[section].count
    }
Configure The Cells
Add this method:
override func tableView(_ tableView: UITableView, cellForRowAt indexPath: IndexPath) -> UITableViewCell {
        let cell = tableView.dequeueReusableCell(withIdentifier: "cell", for: indexPath)
        let row = indexPath.row
        let section = indexPath.section
        let menuItem = menuItems.items[section][row]
        cell.textLabel?.text = menuItem.name
        let priceString = String(format:"%2.2f",menuItem.price)
        cell.detailTextLabel?.text = priceString
        return cell
    }
The parameters for this method are the tableView, and a NSIndexPath called indexPath. NSIndexPath has two properties of interest: section and row. The dequeueReusableCell instantiates a UITableViewCell for us, associated with a specific indexPath in the table.
Once we have a cell, we configure it. Usually with table I like to use row and section, so I make those constants. I then get the MenuItem object menuItem, which is the menu item for this row and section. Getting this first saves a lot of extra, confusing typing. textLabel is a UILabel found in the cell. I assign to the text property of textLabel the name of the menu item. I convert the price to a string, and then display it in the second built-in label detailTextLabel. For all cell formats except Basicn and Custom, this will show a smaller label.
Go to the story board and select the Pizza Menu table view. In the identity inspector, set the class to PizzaMenuTableViewController. Build and run. Tap order and then tap a pizza button. You will see the new table:

Adding Basic Headers
The table shows all of the data. We can’t tell in what section each pizza appears. If we displayed section names, this would be much clearer. There are several methods for displaying section information. One of the most common is tableview:TitleForRowInSection . Add this to your PizzaMenuTableViewController code:
override func tableView(_ tableView: UITableView, titleForHeaderInSection section: Int) -> String? {
        return menuItems.sections[section]
    }[section]
}
This method returns a string which is a title for a header row. We use the array menuItems.sections to give a title.
Build and run. The table has sections which make the pizza sections clear. Scroll down the list to see a few calzones:

Selecting a Cell
While this all looks nice, it does nothing. We need to select a menu item. There is another method tableView:didSelectRowAtIndexPath to do this. Add this to your PizzaMenuTableViewController class:
override func tableView(_ tableView: UITableView, didSelectRowAt indexPath: IndexPath) {
    let row = indexPath.row
    let section = indexPath.section
    let order = menuItems.items[section][row]
    order.name += " " + menuItems.sections[section]
    navigationItem.title = order.name
 }
In this method, we have indexPath for a parameter. I created constants row and section that make working with these values a little easier. I get data from our menuItem object, much like we did in cellForRowAtIndexPath and titleForRowInSection. I got the current menu item then appended to string name detailing the type of pizza from the section. I placed order in the title of the navigation controller bar.
Build and run . Scroll down the table view and select a Chicken Pesto Calzone

We have two forms of feedback right now. First we have the title, and we also have the selected item highlighted. To show only the title, deselect the item once posted. Add this to the bottom of the didSelectRowAtIndexPath method:
tableView.deselectRow(at:indexPath, animated: true)
Build and run. Now the tapped row flashes, but does not stay solid. This gives feedback we tapped the button, but does not stay on. If you want all your user feedback to be the label on top, you can set animated: to false.
Adding Delegates
While the app can select an menu, it cannot pass it back among the controllers. Like any other Navigation controller, we delegate the data back to the root controller. To get back to the root and display our selection, we pass the model through the full menu we made. If you are unfamiliar with delegates and how they work, you might want to read this lesson on delegates first.
A Delegate File
Since the application will pass the same object, the app uses the same delegate several times in different view controllers. Make a new file with Command- N. Make a Cocoa Touch Class in Swift named MenuItemSelectionDelegate, subclassing NSObject. Remove the class below the import UIKit. Add the following in its place:
protocol MenuItemSelectionDelegate{
    func didSelectMenuItem(controller: UITableViewController, menuItem:MenuItem)
}
That is our simple generic protocol, which passes the view controller and the model back to the calling controller.
Setting up the Delegate
Go to the PizzaMenuTableViewController . Add the delegate property:
var delegate:MenuItemSelectionDelegate! = nil
In the didSelectRowAtIndexPath method, set the model and call the protocol:
delegate.didSelectMenuItem(controller: self, menuItem: order)
Go to the FullMenuViewController. Adopt the protocol by adding the protocol to the class definition:
class FullMenuViewController: UITableViewController,MenuItemSelectionDelegate {
Add the model as a property:
var menuItem = MenuItem()
Add the required method for the delegate. In this case we want to update the model in this view controller, then dismiss the calling view controller.
    func didSelectMenuItem(controller: UITableViewController, menuItem: MenuItem) {
        self.menuItem = menuItem
        navigationItem.title = menuItem.name
        if controller.navigationController?.popViewController(animated: true) == nil {return}
    }
Since we lose feedback of what we selected in the pizza menu, we added a line to display the passed order as the navigation title.
Last step is to set up prepareForSegue. Add the following:
override func prepare(for segue: UIStoryboardSegue, sender: Any?) {
    if segue.identifier == "Pizza"{
        let vc = segue.destination as! PizzaMenuTableViewController
        vc.delegate = self
    }
    if segue.identifier == "Deep Dish"{
       let vc = segue.destination as! PizzaMenuTableViewController
       vc.delegate = self
    }
    if segue.identifier == "Calzone"{
       let vc = segue.destination as! PizzaMenuTableViewController
       vc.delegate = self
    }
}
Since we have three segues, we define each segue. Build and Run. Select a Seafood Pizza. The menu changes to show the order:

The Order List Table
Dynamic table views change. User input can change them, adding cells as we do interactions. We will have the RootTableViewController list the items we order.This needs an array of OrderModel.
Make the Model
Press Command-N to make a new file. Make a Cocoa Touch Class in Swift subclassing NSObject. Name it OrderList.
Once saved change the class to this:
class OrderList :NSObject{
    var list:[MenuItem] = []
    func add(menuItem:MenuItem){
        list = list + [menuItem]
    }
}
Go to the RootTableViewController. Add the model to the view controller:
var orderList = OrderList()
Configure the Table View
Compared to the PizzaMenuViewController, there is a lot of code here. As I’ve mentioned, I tend to make my own TableViewController whenever I can.
Find the numberOfSectionsInTableView method.
   override func numberOfSections(in tableView: UITableView) -> Int {
        return 1
    }
Unlike the pizza menu we have only one section. Under the numberOfSectionsInTableView, is numberOfRowsInSection. Replace that code with this.
override func tableView(tableView: UITableView, numberOfRowsInSection section: Int) -> Int {
        return orderList.list.count
    }
Like PizzaMenuTableViewController, we count the elements in the array to return the number of rows in each section, though this time we have only one section.
Our last required method is under numberOfRowsInSection . Remove the block comments from cellForRowAtIndexPath and change the code there to this.
override func tableView(_ tableView: UITableView, cellForRowAt indexPath: IndexPath) -> UITableViewCell {
    let cell = tableView.dequeueReusableCell(withIdentifier: "cell", for: indexPath)
    let row = indexPath.row
    let order = orderList.list[row]
    cell.textLabel?.text = order.name
    return cell
}
Be especially careful to make the identifier cell. It must match the identifier we set up in the storyboard.
The Model Delegate
Our last step is get the order from FullMenuViewController. Go to the storyboard and open the assistant editor set to automatic. Select the bar button in the FullMenuViewController scene. Control drag from the Save bar button to the code. Make a action for a UIBarButtonItem called saveButton.. Close the assistant editor and go back to the FullMenuViewController code.
Add this property to the class:
var delegate:MenuItemSelectionDelegate! = nil
In the code for saveButton, add a delegate method call:
@IBAction func saveButton(sender: UIBarButtonItem) {
        delegate.didSelectMenuItem(self, order:myOrder)
    }
Go to the RootTableViewController. Adopt the delegate in the class definition:
class RootTableViewController: UITableViewController,MenuItemSelectionDelegate {
Add the required method:
func didSelectMenuItem(controller: UITableViewController, order: OrderModel) {
        orderList.addList(order)
        controller.navigationController?.popViewControllerAnimated(true)
tableView.reloadData()
    }
We add the order to the list, then dismiss the controller. Once dismissed we update the table.
Our last step is connect up via the FullMenuController segue. Uncomment the prepareForSegue and change it to this:
    override func prepare(for segue: UIStoryboardSegue, sender: Any?) {
        if segue.identifier == "Order"{
            let vc = segue.destination as! FullMenuViewController
            vc.delegate = self
        }
    }
Build and run. Select a few menu times and save them. you will see the table grow on the root screen.

Table views are one of the most powerful and often used controls in iOS. Social media platforms such as Twitter, Facebook and Instagram are all table views. So are Messages and reminders. Ordering applications such as this pizza application use table views as well. While this has gone into depth on presenting both dynamic and static tableviews, there’s a lot more to learn. Mastery of UITableView is essential for your developer toolbox.
The Whole Code
This is a lot of code. You can download the completed project here: swifttableviewdemo.zip I’ve broken the code into models, protocols and view controllers for the easiest consumption.
Models
MenuItem.swift
//
//  MenuItem.swift
//  SwiftTableViewDemo
//
//  Created by Steven Lipton on 10/1/16.
//  Copyright © 2016 Steven Lipton. All rights reserved.
//

import UIKit

class MenuItem: NSObject {
    var name = "None"
    var price = 0.00
    var special = false
    override init(){}
    init(name:String,price:Double,special:Bool){
        self.name = name
        self.price = price
        self.special = special
    }
}
MenuItems.swift
//
//  MenuItems.swift
//  SwiftTableViewDemo
//
//  Created by Steven Lipton on 10/1/16.
//  Copyright © 2016 Steven Lipton. All rights reserved.
//

import UIKit


class MenuItems:NSObject{
    var sections:[String] = []
    var items:[[MenuItem]] = []

    func add(section: String, item:[MenuItem]){
        sections = sections + [section]
        items = items + [item]
    }
}


class PizzaMenuItems: MenuItems {
    override init() {
        super.init()

        add(section:"Pizza", item: [
            MenuItem(name:"Margherita",price:7.95,special:false),
            MenuItem(name:"BBQ Chicken",price:11.49,special:false),
            MenuItem(name:"Pepperoni",price:8.45,special:false),
            MenuItem(name:"Sausage",price:8.45,special:false),
            MenuItem(name:"Seafood",price:12.75,special:false),
            MenuItem(name:"Special",price:13.50,special:true)
        ])
        add(section:"Deep Dish Pizza", item: [
           MenuItem(name:"Sausage",price:10.65,special:false),
           MenuItem(name:"Meat Lover's",price:12.35,special:false),
           MenuItem(name:"Veggie Lover's",price:10.00,special:false),
           MenuItem(name:"BBQ Chicken",price:16.60,special:true),
           MenuItem(name:"Mushroom",price:11.25,special:false),
           MenuItem(name:"Special",price:15.45,special:true)
        ])
        add(section:"Calzone", item: [
          MenuItem(name:"Sausage",price:8.00,special:false),
          MenuItem(name:"Chicken Pesto",price:8.00,special:false),
          MenuItem(name:"Prawns and Mushrooms",price:8.00,special:false),
          MenuItem(name:"Primavera",price:8.00,special:false),
          MenuItem(name:"Meatball",price:8.00,special:false)
        ])
    }

}
OrderList.swift
//
//  OrderList.swift
//  SwiftTableViewDemo
//
//  Created by Steven Lipton on 10/2/16.
//  Copyright © 2016 Steven Lipton. All rights reserved.
//

import UIKit

class OrderList :NSObject{
    var list:[MenuItem] = []
    func add(menuItem:MenuItem){
        list = list + [menuItem]
    }
}
Protocols
MenuItemSelectionDelegate.swift
//
//  MenuItemSelectionDelegate.swift
//  SwiftTableViewDemo
//
//  Created by Steven Lipton on 10/2/16.
//  Copyright © 2016 Steven Lipton. All rights reserved.
//

import UIKit

protocol MenuItemSelectionDelegate{
    func didSelectMenuItem(controller: UITableViewController, menuItem:MenuItem)
}
View Controllers
RootTableViewController.swift
//
//  RootTableViewController.swift
//  SwiftTableViewDemo
//
//  Created by Steven Lipton on 10/1/16.
//  Copyright © 2016 Steven Lipton. All rights reserved.
//

import UIKit

class RootTableViewController: UITableViewController,MenuItemSelectionDelegate {
    var orderList = OrderList()

    func didSelectMenuItem(controller: UITableViewController, menuItem: MenuItem) {
        orderList.add(menuItem: menuItem)
        if controller.navigationController?.popViewController(animated: true) == nil {return}
        tableView.reloadData()
    }

    override func viewDidLoad() {
        super.viewDidLoad()

        // Uncomment the following line to preserve selection between presentations
        // self.clearsSelectionOnViewWillAppear = false

        // Uncomment the following line to display an Edit button in the navigation bar for this view controller.
        // self.navigationItem.rightBarButtonItem = self.editButtonItem()
    }

    override func didReceiveMemoryWarning() {
        super.didReceiveMemoryWarning()
        // Dispose of any resources that can be recreated.
    }

    // MARK: - Table view data source

    override func numberOfSections(in tableView: UITableView) -> Int {
        return 1
    }

    override func tableView(_ tableView: UITableView, numberOfRowsInSection section: Int) -> Int {

        return orderList.list.count
    }


    override func tableView(_ tableView: UITableView, cellForRowAt indexPath: IndexPath) -> UITableViewCell {
        let cell = tableView.dequeueReusableCell(withIdentifier: "cell", for: indexPath)
        let row = indexPath.row
        let order = orderList.list[row]
        cell.textLabel?.text = order.name
        return cell
    }

    /*
    // Override to support conditional editing of the table view.
    override func tableView(_ tableView: UITableView, canEditRowAt indexPath: IndexPath) -> Bool {
        // Return false if you do not want the specified item to be editable.
        return true
    }
    */

    /*
    // Override to support editing the table view.
    override func tableView(_ tableView: UITableView, commit editingStyle: UITableViewCellEditingStyle, forRowAt indexPath: IndexPath) {
        if editingStyle == .delete {
            // Delete the row from the data source
            tableView.deleteRows(at: [indexPath], with: .fade)
        } else if editingStyle == .insert {
            // Create a new instance of the appropriate class, insert it into the array, and add a new row to the table view
        }
    }
    */

    /*
    // Override to support rearranging the table view.
    override func tableView(_ tableView: UITableView, moveRowAt fromIndexPath: IndexPath, to: IndexPath) {

    }
    */

    /*
    // Override to support conditional rearranging of the table view.
    override func tableView(_ tableView: UITableView, canMoveRowAt indexPath: IndexPath) -> Bool {
        // Return false if you do not want the item to be re-orderable.
        return true
    }
    */


    // MARK: - Navigation

    // In a storyboard-based application, you will often want to do a little preparation before navigation
    override func prepare(for segue: UIStoryboardSegue, sender: Any?) {
        if segue.identifier == "Order"{
            let vc = segue.destination as! FullMenuViewController
            vc.delegate = self
        }
    }


}
FullMenuViewController.swift
//
//  FullMenuViewController.swift
//  SwiftTableViewDemo
//
//  Created by Steven Lipton on 10/1/16.
//  Copyright © 2016 Steven Lipton. All rights reserved.
//

import UIKit

class FullMenuViewController: UITableViewController,MenuItemSelectionDelegate {
    var menuItem = MenuItem()
    var delegate:MenuItemSelectionDelegate! = nil


    @IBAction func saveButton(_ sender: UIBarButtonItem) {
        delegate.didSelectMenuItem(controller: self, menuItem: menuItem)
    }

    func didSelectMenuItem(controller: UITableViewController, menuItem: MenuItem) {
        self.menuItem = menuItem
        navigationItem.title = menuItem.name
        if controller.navigationController?.popViewController(animated: true) == nil {return}
    }

    override func viewDidLoad() {
        super.viewDidLoad()

        // Do any additional setup after loading the view.
    }

    override func didReceiveMemoryWarning() {
        super.didReceiveMemoryWarning()
        // Dispose of any resources that can be recreated.
    }

    override func prepare(for segue: UIStoryboardSegue, sender: Any?) {
        if segue.identifier == "Pizza"{
            let vc = segue.destination as! PizzaMenuTableViewController
            vc.delegate = self
        }
        if segue.identifier == "Deep Dish"{
            let vc = segue.destination as! PizzaMenuTableViewController
            vc.delegate = self
        }
        if segue.identifier == "Calzone"{
            let vc = segue.destination as! PizzaMenuTableViewController
            vc.delegate = self
        }

    }
}
PizzaMenuTableViewController.swift
//
//  PizzaMenuTableViewController.swift
//  SwiftTableViewDemo
//
//  Created by Steven Lipton on 10/2/16.
//  Copyright © 2016 Steven Lipton. All rights reserved.
//

import UIKit

class PizzaMenuTableViewController: UITableViewController {

    var myOrder = MenuItem()
    var menuItems = PizzaMenuItems()
    var delegate:MenuItemSelectionDelegate! = nil
    override func viewDidLoad() {
        super.viewDidLoad()

        // Do any additional setup after loading the view.
    }

    override func numberOfSections(in tableView: UITableView) -> Int {
        return menuItems.sections.count
    }

    override func tableView(_ tableView: UITableView, numberOfRowsInSection section: Int) -> Int {
        return menuItems.items[section].count
    }

    override func tableView(_ tableView: UITableView, cellForRowAt indexPath: IndexPath) -> UITableViewCell {
        let cell = tableView.dequeueReusableCell(withIdentifier: "cell", for: indexPath)
        let row = indexPath.row
        let section = indexPath.section
        let menuItem = menuItems.items[section][row]
        cell.textLabel?.text = menuItem.name
        let priceString = String(format:"%2.2f",menuItem.price)
        cell.detailTextLabel?.text = priceString

        return cell
    }

    override func tableView(_ tableView: UITableView, titleForHeaderInSection section: Int) -> String? {
        return menuItems.sections[section]
    }

    override func tableView(_ tableView: UITableView, didSelectRowAt indexPath: IndexPath) {
        let row = indexPath.row
        let section = indexPath.section
        let order = menuItems.items[section][row]
        order.name += " " + menuItems.sections[section]
        navigationItem.title = order.name
        tableView.deselectRow(at: indexPath, animated: true)
        delegate.didSelectMenuItem(controller: self, menuItem: order)
    }

}

Leave a comment